Final Cut
Final Cut was an integral part in the construction stage for our group as it was the software we used to edit and produce our final piece of media, our film trailer. This software allowed us to use lots of different effects, one of which was the colour correction tool. This was very important for our trailer as we filmed during the day therefore it was not that scary of a setting as the lighting was quite bright however with colour correction we were able to alter the scene to make it look more gloomy as oppose to it looking like it was the middle of the day. It also allowed us to make the trailer look as though it was film on a camera within the scene through use of the bad TV effect which was important as we made our trailer in the theme of a vlog. We also partially used Final cut for creating our poster as it had the camcorder effect which we believed made a good border for our picture, this was then further edited on Picmonkey.
|
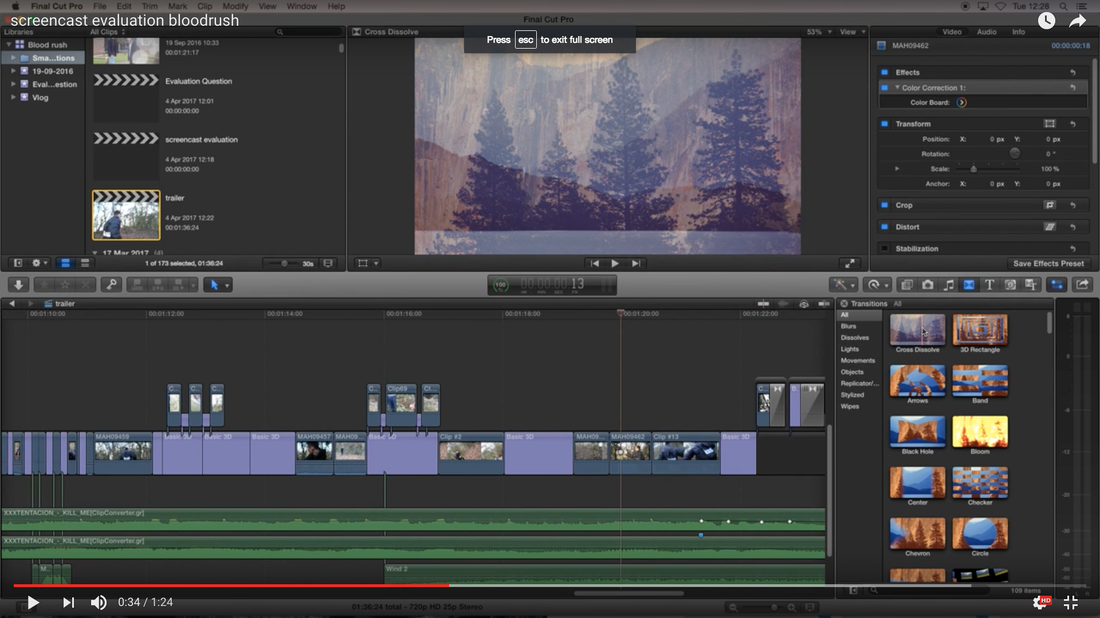
This is an example of the different transitions we could use to merge between each clip on our trailer. This was important for us to have when going to each title scene as we did not want to only have jump cuts as to start off with we wanted it to be slow paced as it was in the style of a vlog. These transitions were helpful for this as it slowly went between shots as oppose to the horror sections where we had fast paced cuts. |
|
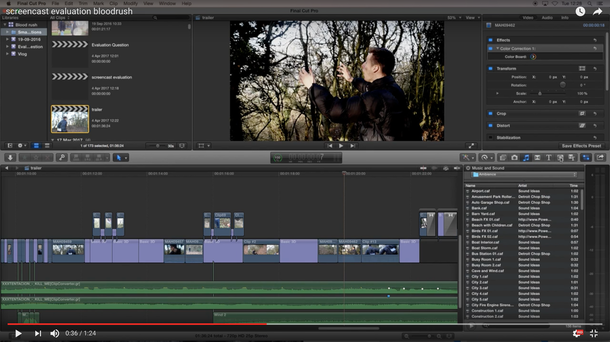
This is an example of the range of audioclips available on Final Cut which we could use to help make a scary atmosphere by including noises that could be seen as a connotation to horror. One example of this is the 'spooky wind' background noise which helps to make an eerie atmosphere. |
|
|
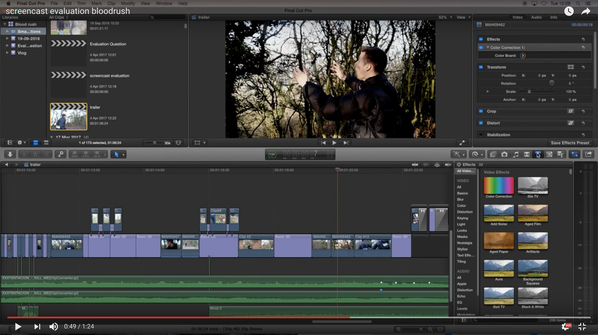
Here is where the effects available to use on Final Cut are which were very important for our trailer as it allowed us to turn the scenes that were filmed in the day, and were therefore bright, into darker and more gloomy looking scenes which looked scarier than the original. An example of an effect we used was the '50's TV' effect which was important for the small shots between scenes which gave the effect that the camera was in the shot and it was supposed to look like it had been filmed by an 'amateur'. |
|
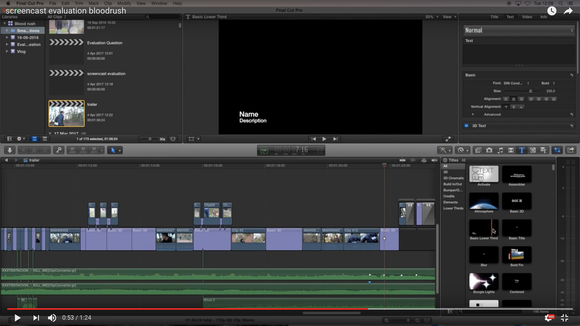
This shows the title choices we could have used and that were available on Final Cut. The main points at which we used these was when writing the reviews for our trailer as well as putting in the titles and the the end scene. The titles we used the most were 'Basic 3D' and 'Basic Title' with the typewriter effect put on top of them. We used these as we believed that a simple looking title would look best on the background we had in our shots. This is especially at the start where it is done in the style of a vlog so having a basic title makes it seem lighthearted. |
|
Weebly
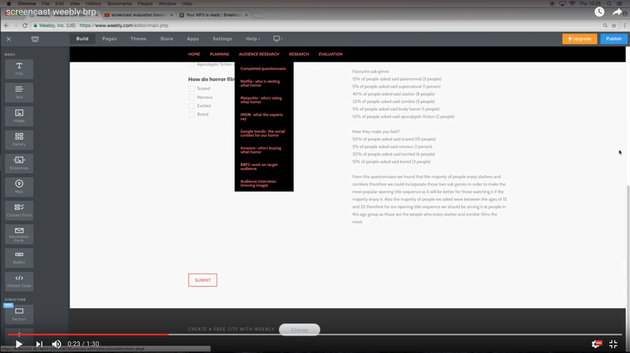
This piece of software was another pivotal part in the creation of our coursework, in this case with the website. It has provided the group with a platform where we can easily present the media we have created along with giving the opportunity to clearly present any planning methods or research we have carried out on multiple different pages. Weebly allows for a professional layout on our website with the ability to drag and drop text, images, titles and videos to any point on the page so that we can design the pages we create to exactly how we want them to look.
|
Weebly was a very useful form of technology to arrange our work as on this website it was very easy to layout each page we created. This is shown by each header containing multiple subheadings. The reason this made our work so easy to navigate is that if someone is looking for a specific page they can easily workout what header it would be under. |
|
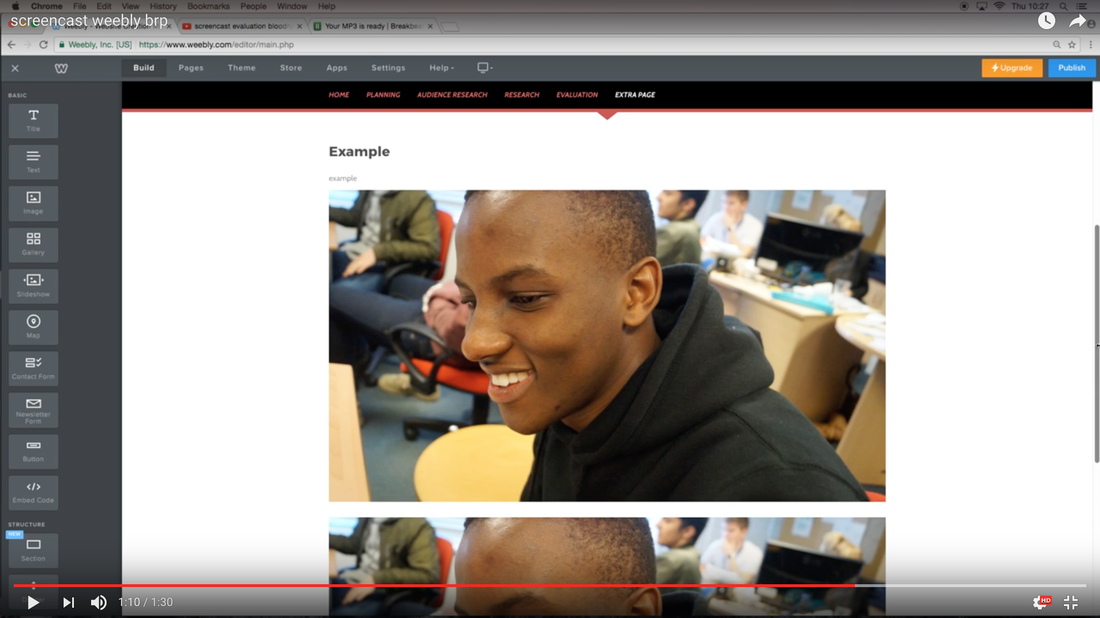
Another reason why Weebly was so helpful for the creation of our planning, research and evaluation was the ease at which we could create our pages and put in different features. This is because everything we could include was listed on the left and could be dragged onto the page quickly and easily. This was helpful for making pages as we could insert pictures videos and text in a matter of seconds. |
|
Clip converter
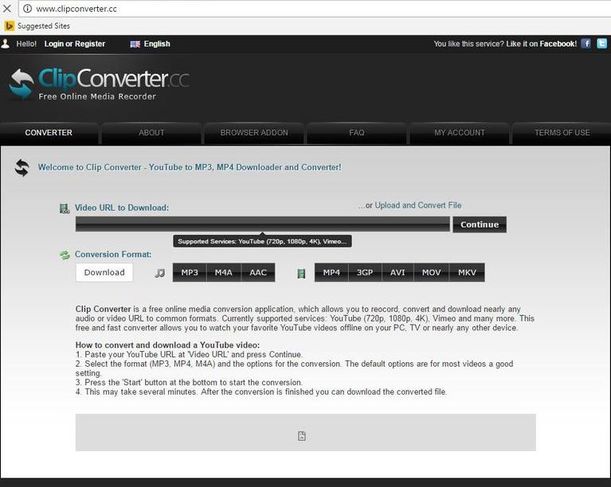
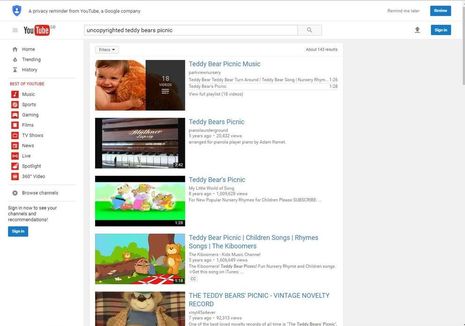
Although not as important as the previous two technologies to our content, clip converter was very useful in allowing us to use any backing tracks from Youtube and using them over our trailer along with any other videos we created. One example of this was with the 'Teddy Bear's Picnic' backing track which without the help of Clip Converter we would not have been able to convert into an audio clip and as a result would not have been able to use with our trailer.
Picmonkey
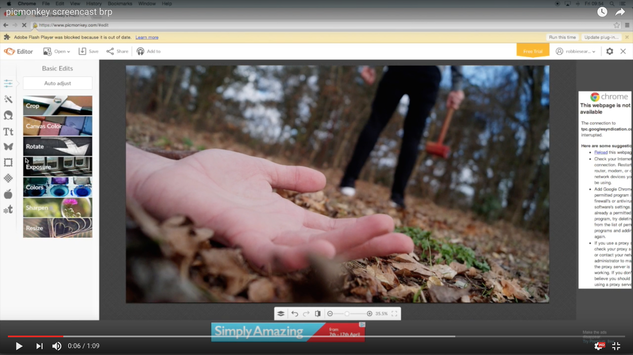
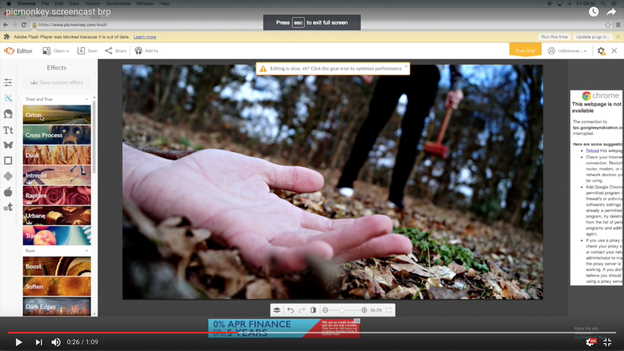
Picmonkey was the software we used to edit our poster and our magazine. This was a very useful website as it gave us numerous editing options which allowed us to convert a standard picture into a professional picture that was appropriate for a horror poster. This software allowed us to use a numerous amount of effects on our poster to make the colours, shadows and lighting on the picture as professional as possible. These effects and tools included exposure, sharpen and zombulate which let us create a more decayed look on the dead hand.
|
Pic-monkey was very useful as each section of the website was very well laid out so we could work our way around it quickly and easily. For example in this picture we could change the key features of the photo through these seven categories which allowed us to transform the picture straightaway. Just from these options we could crop, rotate and change the volume/exposure of the photo to make it darker or to make a certain part of the photo more shadowed. |
|
Here are further effect options that we used to edit our picture as it provides more options to distort and change the contrast in the colours. It also allowed us to change the background of the picture, for example by making dark edges on the picture which further increased the focal point on the dead hand and the hammer. |
|
|
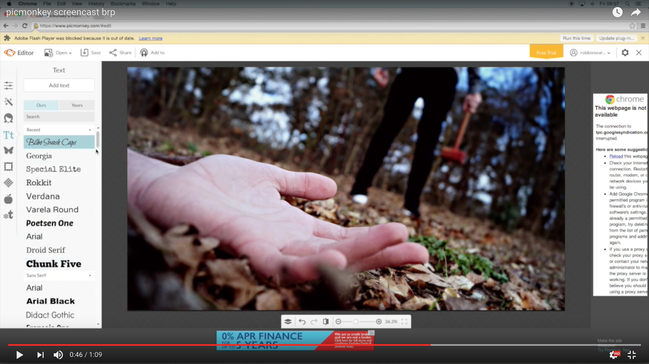
We have also got the possibility to add titles onto the pictures with lots of different designs on offer to help make the poster look even more like it is related to a horror film. Different titles are also available with each effect, for example the 'zombulate' feature has a 'zombulate' title option therefore you can ensure that the title you use matches the effects you are putting on. |
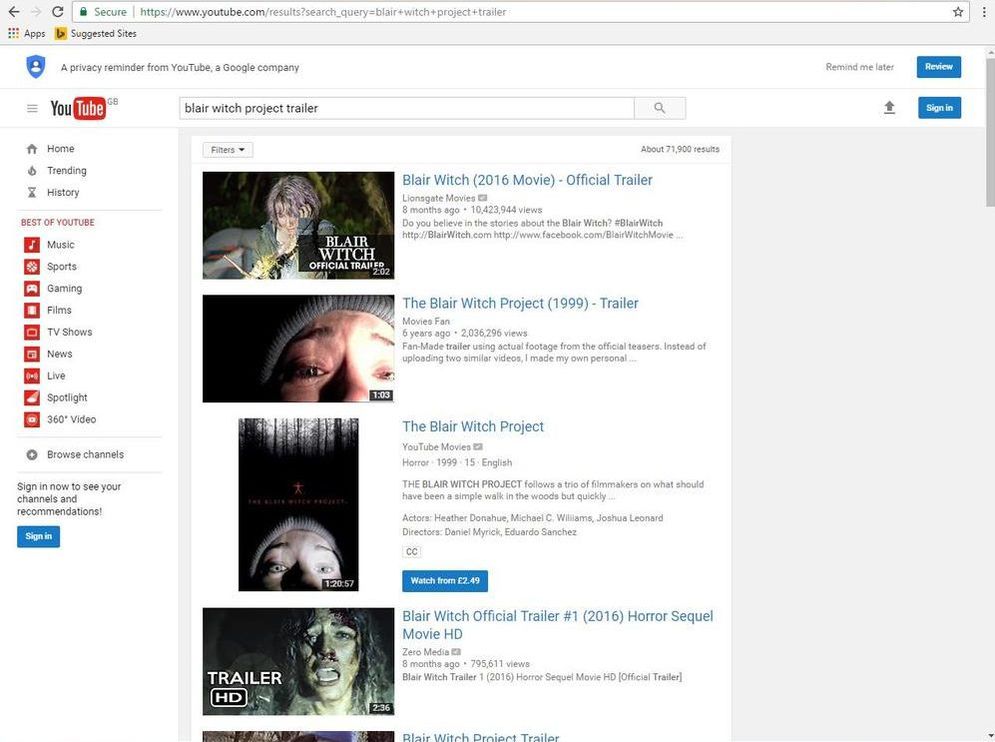
Youtube
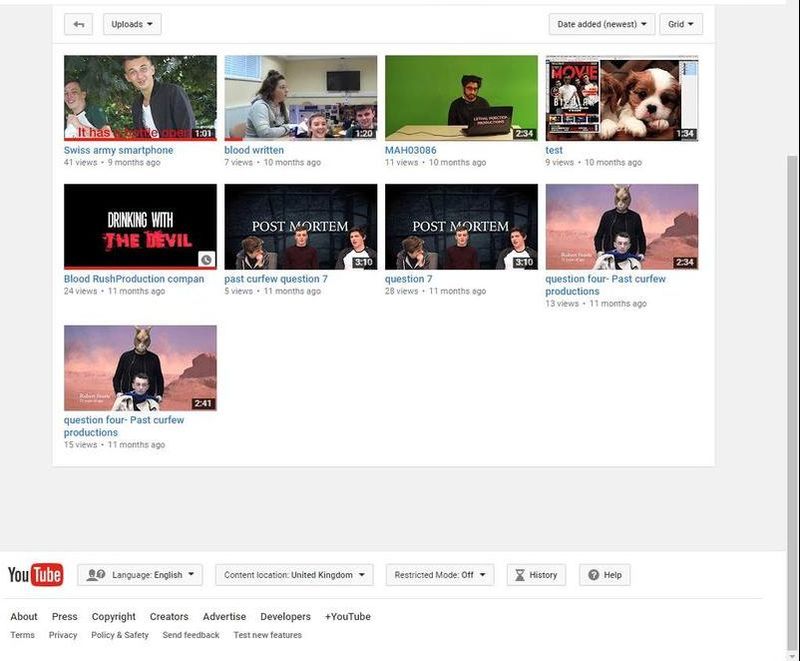
Youtube was important for the group as it gave us the ability to import our trailer onto our website when it was finished editing. Along with this we used Youtube to get background music which, once converted on clip converter, could be used as an audio file behind our trailer. This software was also helpful when conducting our research and planning pages as it allowed us to look at trailers produced by other film companies to see what a successful trailer includes which we used as inspiration for what we wanted to put into our own. This technology worked alongside the ability to import our work quickly and easily as with only a few clicks we could upload a video onto Youtube as well as putting it on our website.

|
|
|
|
Quicktime Player

Quicktime Player was very important for the creation of the evaluation on our website as it allowed us to record our screen and produce videos on what media and technologies we used to create our website and trailer. It was helpful as it allowed us to record everything happening on our screen and then easily import it onto our timeline to edit and put onto our website. This also provided the opportunity to record people with the camera on the front of the mac which helped us to gain feedback on our work which was another section of creating our evaluation.
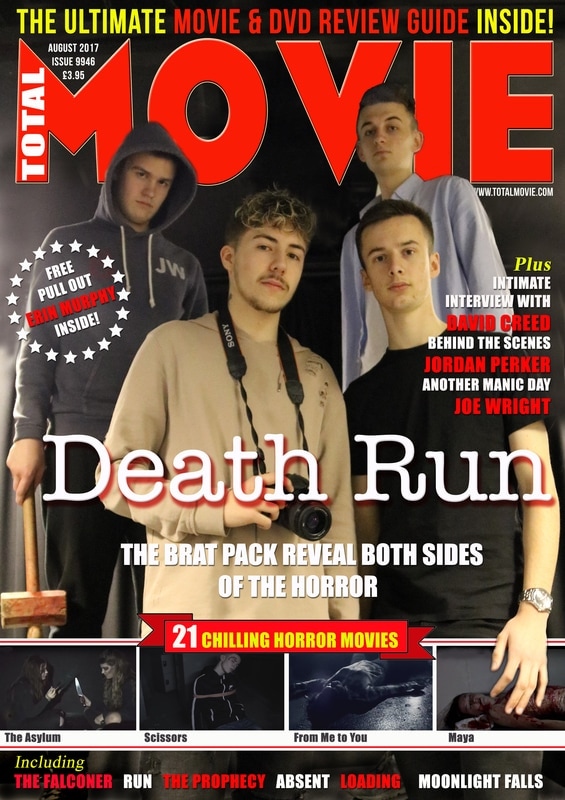
Photoshop
Photoshop was a key part of allowing the group to create and edit our magazine cover. It provided us with the tools to put the text we wanted over a picture that had been taken and edited to portray our film. This website was also useful when editing for some of our initial ideas for our poster before we decided to edit with Picmonkey. Photoshop has been especially helpful as it provides the option to alter the colour and exposure of the pictures we are editing. This was important as the initial picture that had no editing was too bright to be seen as a professional poster therefore by altering the exposure and the contrast of ther picture we managed to make the background a lot darker.
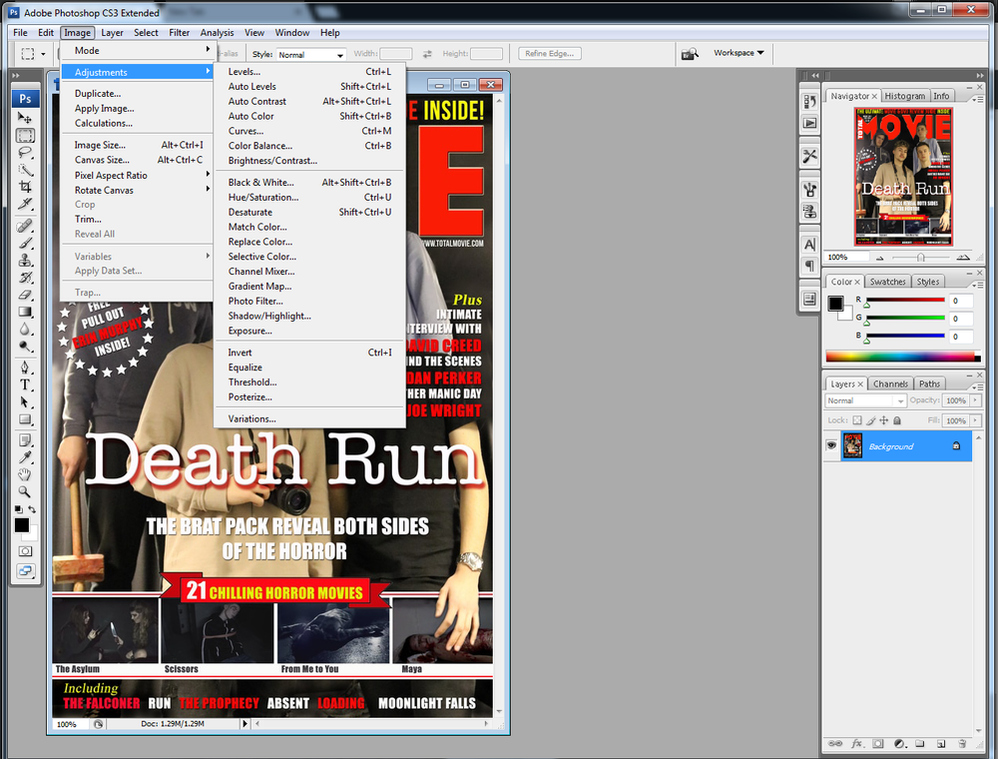
|
This section of Photoshop was one of the main reasons we used the site to edit our magazine as it gave lots of different options to alter both the main focal point of the picture, and the background colour and brightness. For example one of the options we used was the brightness/contrast tool to change what the background of our magazine looked like. This category also offered other useful features such as being able to adjust the contrast, saturation and shadows of the picture. |
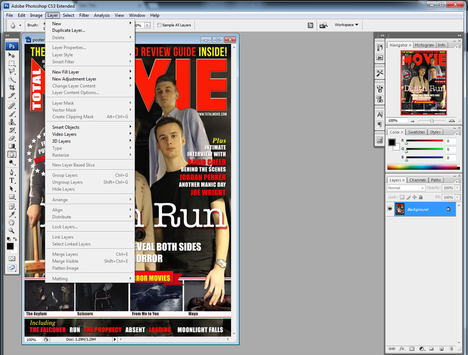
|
This section of the site was another key reason why we used Photoshop for our magazine because it was extremely easy to create layers on which we could put our titles, pieces of text and any other images we wanted to use. This was also helpful for the editing of our magazine as it allowed us to arrange what layers we wanted on top and what layers we wanted to go behind. This is shown by Jordan's (bottom right) hand appearing above the layer with the other movie pictures on it. Another instance on our cover where this happened was with the title of the magazine, 'Movie', as it is positioned behind Dave (top left) and Erin's(top right) heads.
|
|
